近期遇到有些用户问PBCMS的默认表单提交的样式要怎么才能美化一下?直接改PHP文档吗?那更新不是没有了?今天在这里咱们摆开了揉碎了讲一讲。
其实PB系统的留言板提交、自定义表单提交的返回格式如下:
<script type="text/javascript">alert("这里是程序返回的内容");window.history.go(-1);</script>
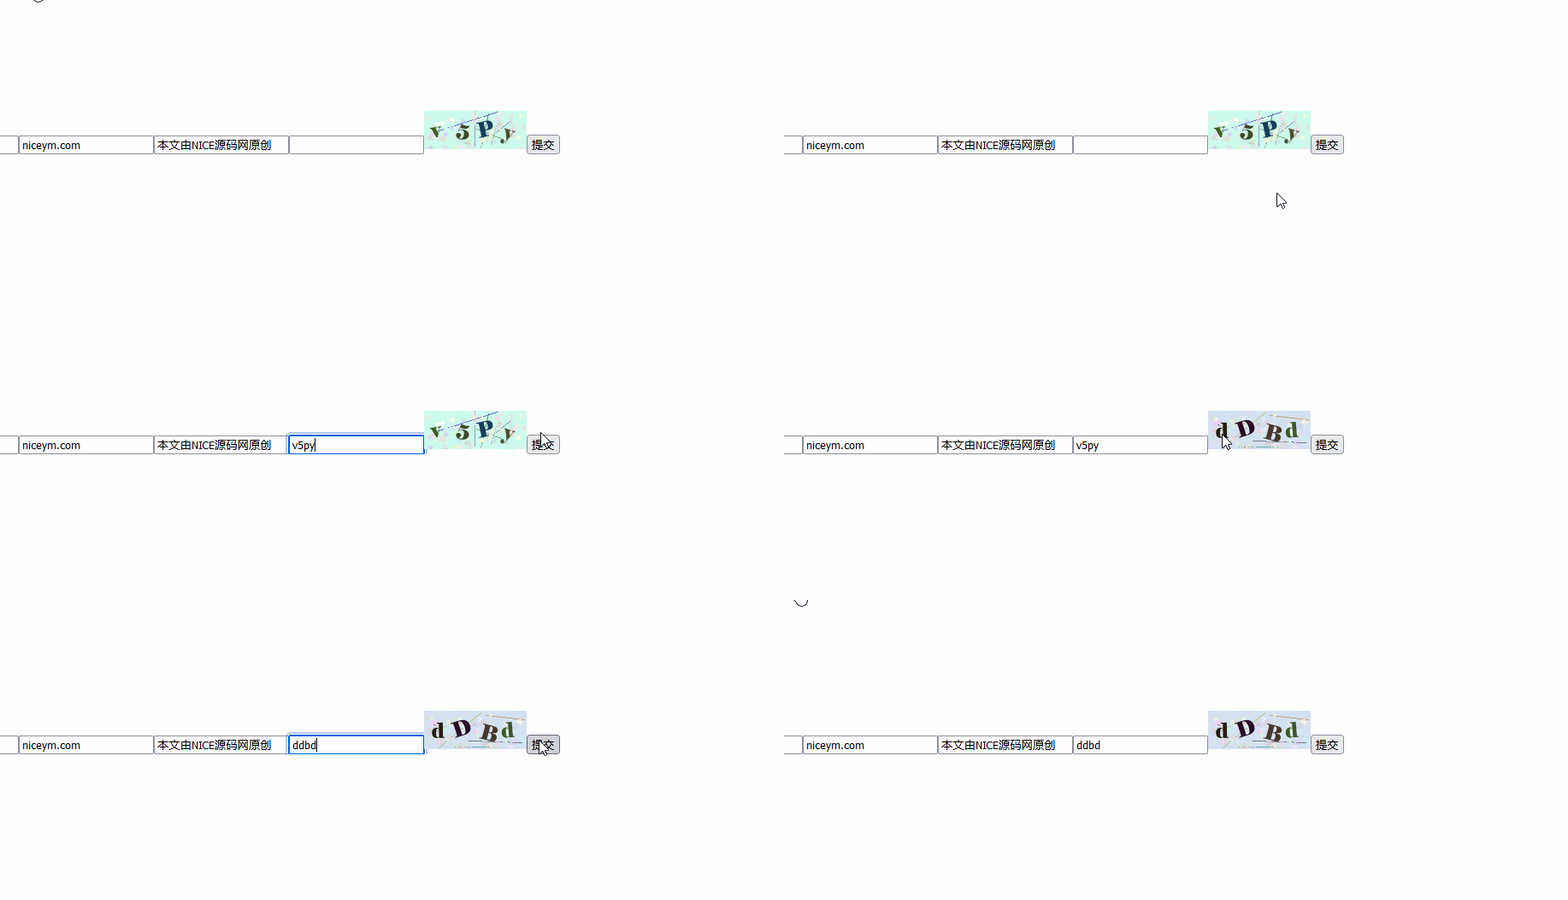
可以很明显的看到,它就是JS原生的一个弹窗提示,并且还附带了一个返回上一页的跳转事件,其实它实际展现的效果如下图:

有没有感觉这东西比较丑?你是不是还在使用这种原生的弹窗呢?想修改?那么跟着NICE源码小编一起来看一下把~
其实看到这个需求的时候,感觉直接上个LAYUI最便捷了,转念一想,并不是所有同学都有引入layui的,既然这样,那就只能将这些常用的方法都说一遍了~
首先咱们直接上原生JS来阻止表单的提交事件,并使用使用 fetch 函数发送请求,然后使用正则表达式将返回数据提取出来并以自己想要的方式返回~
先来看个效果,可能样式不是很好看,但是本文主要讲解把数据提取出来,样式各位可以自己调整啦~

废话少说,直接上代码(以下代码增加了详细的注释,由NICE小编原创):
// 选择表单元素,并给表单元素添加提交事件监听器
document.querySelector('.niceymform').addEventListener('submit', function (event) {
    event.preventDefault(); // 阻止表单提交事件的默认行为
    var form = event.target; // 获取触发事件的表单元素
    var formData = new FormData(form); // 创建一个 FormData 对象,用于存储表单数据

    // 使用 fetch 函数发送请求
    fetch(form.action, {
        method: form.method, // 设置请求方法为表单的方法(GET 或 POST)
        body: formData // 设置请求体为表单数据
    })
        .then(function (response) {
            return response.text(); // 获取响应的原始文本数据
        })
        .then(function (data) {
            var regex = /alert\("([^"]+)"\)/; // 创建一个正则表达式,用于匹配 alert 弹窗的内容
            var matches = data.match(regex); // 使用正则表达式匹配响应数据中的 alert 弹窗内容
            if (matches && matches.length > 1) {
                var alertContent = matches[1]; // 获取匹配到的 alert 弹窗内容
                createPopup(alertContent); // 调用 createPopup 函数创建弹窗,并将提取的内容作为参数传递
            }
        })
        .catch(function (error) {
            console.error(error); // 捕获并打印错误信息
        });
});
如果你认真看一下代码就能发现,这里将提取出来的内容alertContent以参数的方式传递给了createPopup函数,那么接下来我们只需要将createPopup函数内写好弹窗即可,接下来看一下我写的弹窗示例,其实写到这里你完全可以自己写一个处理方式,不必完全参照我的代码了:
    // 定义一个全局变量,用于存储定时器
    var popupTimer;

    // 创建弹出窗口函数,接受一个消息参数
    function createPopup(message) {
        // 创建一个遮罩层元素
        var overlay = document.createElement('div');
        overlay.className = 'overlay';
        // 添加点击事件监听器,点击遮罩层时关闭弹出窗口
        overlay.addEventListener('click', closePopup);
        // 将遮罩层添加到文档的body中
        document.body.appendChild(overlay);

        // 创建弹出窗口元素
        var popup = document.createElement('div');
        popup.className = 'popup';
        // 设置弹出窗口的文本内容为传入的消息
        popup.textContent = message;
        // 将弹出窗口添加到文档的body中
        document.body.appendChild(popup);

        // 调用居中弹出窗口函数
        centerPopup();
        // 设置一个定时器,3秒后自动关闭弹出窗口
        popupTimer = setTimeout(closePopup, 3000);
    }

    // 关闭弹出窗口函数
    function closePopup() {
        // 查找并移除弹出窗口元素
        var popup = document.querySelector('.popup');
        if (popup) {
            popup.parentNode.removeChild(popup);
        }

        // 查找并移除遮罩层元素
        var overlay = document.querySelector('.overlay');
        if (overlay) {
            overlay.parentNode.removeChild(overlay);
        }

        // 清除定时器
        clearTimeout(popupTimer);
    }

    // 居中弹出窗口函数
    function centerPopup() {
        // 查找弹出窗口元素
        var popup = document.querySelector('.popup');
        if (popup) {
            // 获取窗口的宽度和高度
            var windowWidth = window.innerWidth || document.documentElement.clientWidth || document.body.clientWidth;
            var windowHeight = window.innerHeight || document.documentElement.clientHeight || document.body.clientHeight;

            // 获取弹出窗口的宽度和高度
            var popupWidth = popup.offsetWidth;
            var popupHeight = popup.offsetHeight;

            // 计算弹出窗口的左边距和上边距,使其居中显示
            var left = (windowWidth - popupWidth) / 2;
            var top = (windowHeight - popupHeight) / 2;

            // 设置弹出窗口的左边距和上边距
            popup.style.left = left + 'px';
            popup.style.top = top + 'px';
        }
    }
到这里,继续贴上我的CSS,增加一个毛玻璃遮罩背景,直接看代码:
    .popup {
        position: fixed;
        display: flex;
        justify-content: center;
        align-items: center;
        min-width: 300px;
        min-height: 150px;
        transform: translate(-50%, -50%);
        background-color: white;
        box-shadow: 0 0 10px rgba(0, 0, 0, 0.5);
        padding: 20px;
        text-align: center;
        font-size: 16px;
        color: black;
        border-radius: 10px;
        z-index: 9999;
    }

    .overlay {
        position: fixed;
        top: 0;
        left: 0;
        width: 100%;
        height: 100%;
        background: rgba(255, 255, 255, 0.8);
        backdrop-filter: blur(10px);
        z-index: 9999;
    }
暂时先说到这里,以上代码不需要引入任何库,后续将更新一个layui的表单方式,敬请期待。


