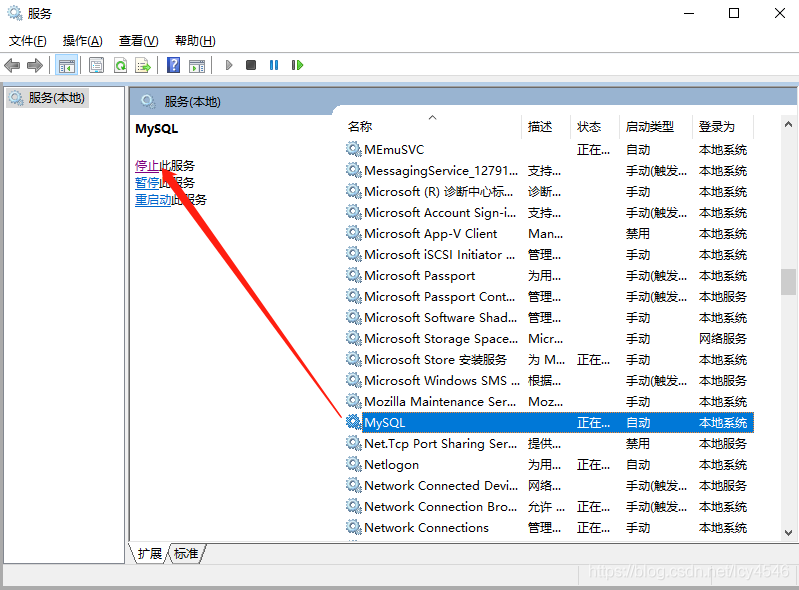
1、首先停止mysql服务
管理员身份开启CMD下命令关闭或者windows服务页面关闭
C:\Users\xxx>net stop mysql

管理员身份开启CMD页面,输入以下命令无密码启动mysql
C:\Users\xxx>mysqld --console --skip-grant-tables --shared-memory
看到如下页面再开启新的CMD页面

在新的CMD页面输入如下
mysql> flush privileges; -- 修改权限
Query OK, 0 rows affected (0.16 sec)

mysql> ALTER USER "root"@"localhost" IDENTIFIED BY "123456"; -- 修改密码
Query OK, 0 rows affected (0.08 sec)
完成如上操作即完成修改密码,退出可以共用新的密码登陆了
附参考:mysql错误:The MySQL server is running with the –skip-grant-tables option so it cannot execute this statement解决方法
下面继续给大家讲解的是mysql错误:The MySQL server is running with the –skip-grant-tables option so it cannot execute this statement解决方法,感兴趣的同学参考下。
错误描述:
mysql> grant all on cactidb.* to dbuser@'localhost' identified by '123';

ERROR 1290 (HY000): The MySQL server is running with the --skip-grant-tables option so it cannot execute this statement
解决方法:
先刷新一下权限表。
mysql> flush privileges;

Query OK, 0 rows affected (0.01 sec)

mysql> grant all on cactidb.* to dbuser@'localhost' identified by '123';

Query OK, 0 rows affected (0.00 sec)
借鉴如下
https://www.jb51.net/article/203587.htm
到此这篇关于Windows10系统下Mysql8.0.13忘记root密码的操作方法的文章就介绍到这了,更多相关Windows10 Mysql8.0.13忘记root密码内容请搜索NICE源码以前的文章或继续浏览下面的相关文章希望大家以后多多支持NICE源码!


