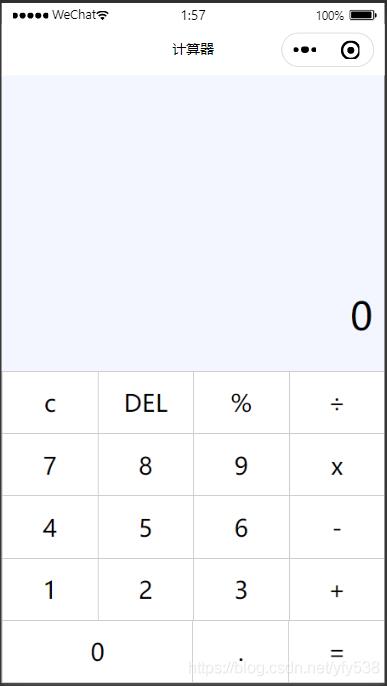
本文实例为大家分享了微信小程序实现计算器功能的具体代码,供大家参考,具体内容如下
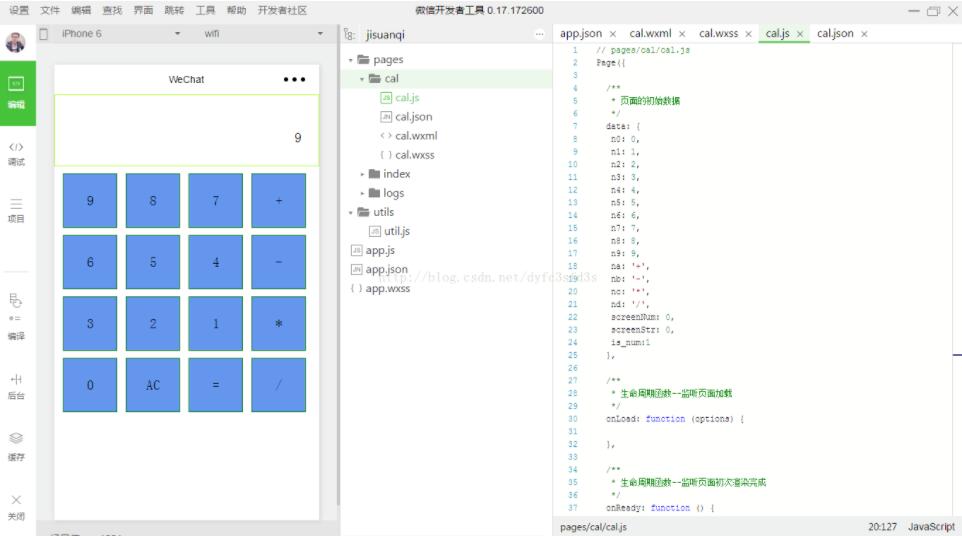
一、微信小程序开发工具界面

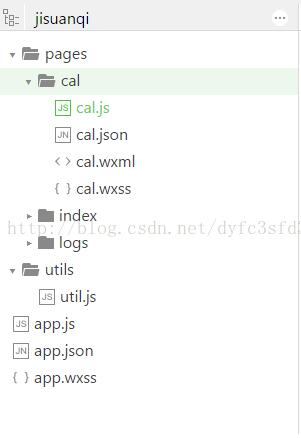
二、目录结构
第一次进到页面它的目录结构如下:

三、需要注意的问题
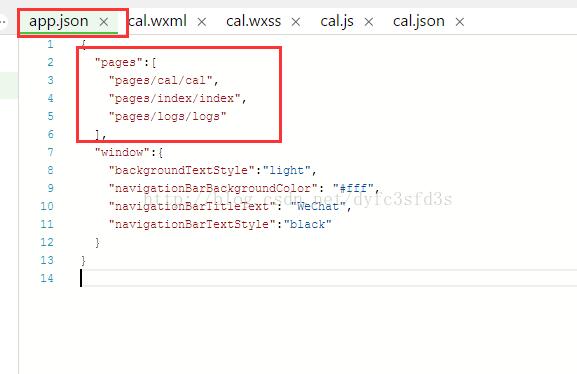
(1)添加的新页面文件,都需要在app.json中进行配置,否则页面报错。

(2)工作原理 通过在<view></view>中添加事件 bindtap=”btnClick” id=”{{n9}}” 相当于click事件。
在js代码中,可以通过this.data.n9获取数据,这些数据的定义都是在js中

通过在<view id=”{{btn_a}}”><view>填写id,在具体的函数中,event.target.id去判断id是多少,进行区分。就可以实现,不同标签的点击,然后进行业务逻辑。如果需要访问数据,则是通过this.data.xx。
计算器的wxml页面
<view class="content">
  <view class="xianshi">{{screenNum}}</view>
  <view class="anniu">
    <view class="item blue" bindtap="btnClick" id="{{n9}}">9</view>
    <view class="item blue" bindtap="btnClick" id="{{n8}}">8</view>
    <view class="item blue" bindtap="btnClick" id="{{n7}}">7</view>
    <view class="item blue" bindtap="btnClick" id="{{na}}">+</view>
  </view>
   <view class="anniu">
    <view class="item blue" bindtap="btnClick" id="{{n6}}">6</view>
    <view class="item blue" bindtap="btnClick" id="{{n5}}">5</view>
    <view class="item blue" bindtap="btnClick" id="{{n4}}">4</view>
    <view class="item blue" bindtap="btnClick" id="{{nb}}">-</view>
  </view>
   <view class="anniu">
    <view class="item blue" bindtap="btnClick" id="{{n3}}">3</view>
    <view class="item blue" bindtap="btnClick" id="{{n2}}">2</view>
    <view class="item blue" bindtap="btnClick" id="{{n1}}">1</view>
    <view class="item blue" bindtap="btnClick" id="{{nc}}">*</view>
  </view>
   <view class="anniu">
    <view class="item blue" bindtap="btnClick" id="{{n0}}">0</view>
    <view class="item blue" bindtap="btnClear">AC</view>
    <view class="item blue" bindtap="btnJs">=</view>
    <view class="item blue" bindtap="btnClick" id="{{nd}}">/</view>
  </view>
</view>
// pages/cal/cal.js
Page({

  /**
   * 页面的初始数据
   */
  data: {
   n0: 0,
   n1: 1,
   n2: 2,
   n3: 3,
   n4: 4,
   n5: 5,
   n6: 6,
   n7: 7,
   n8: 8,
   n9: 9,
   na: '+',
   nb: '-',
   nc: '*',
   nd: '/',
   screenNum: 0,
   screenStr: 0,
   is_num:1
  },

  /**
   * 生命周期函数--监听页面加载
   */
  onLoad: function (options) {

  },

  /**
   * 生命周期函数--监听页面初次渲染完成
   */
  onReady: function () {

  },

  /**
   * 生命周期函数--监听页面显示
   */
  onShow: function () {

  },

  /**
   * 生命周期函数--监听页面隐藏
   */
  onHide: function () {

  },

  /**
   * 生命周期函数--监听页面卸载
   */
  onUnload: function () {

  },

  /**
   * 页面相关事件处理函数--监听用户下拉动作
   */
  onPullDownRefresh: function () {

  },

  /**
   * 页面上拉触底事件的处理函数
   */
  onReachBottom: function () {

  },

  /**
   * 用户点击右上角分享
   */
  onShareAppMessage: function () {

  },
  btnClick:function(event){
    //console.log('你按得键是'+event.target.id);
    //console.log('上一次' + this.data.is_num);
    var op='';
    var data=0;
    var last_is_num = this.data.is_num;
    //这次输入的是什么
    if (event.target.id == '9' || event.target.id == '8' || event.target.id == '7' || event.target.id == '6' || event.target.id == '5' || event.target.id == '4' || event.target.id == '3' || event.target.id == '2' || event.target.id == '1' || event.target.id == '0') {
      data = event.target.id;
      this.setData({ is_num: 1 });
    }
    if (event.target.id == '+' || event.target.id == '-' || event.target.id == '*' || event.target.id == '/') {
      op = event.target.id;
      this.setData({ is_num: 0 });
    }
    if (last_is_num==1){
      //如果上一次是数字
      if (op == ''){
        //这一次是数字
        if (this.data.screenNum!=0){
          this.setData({ screenNum: this.data.screenNum + data });
          this.setData({ screenStr: this.data.screenStr + data });
        }else{
          this.setData({ screenNum: data});
          this.setData({ screenStr: data });
        }
      }else{
        this.setData({ screenNum: this.data.screenNum + op });
        this.setData({ screenStr: this.data.screenStr +',' +op+',' });
      }
    }else{
      //上次不是数字
      if (data != 0) {
        //这一次是数字
        this.setData({ screenNum: this.data.screenNum + data });
        this.setData({ screenStr: this.data.screenStr + data });
      } else {
        return;
      }
    }
    //console.log(op+'aaaaa'+data);
    //console.log('现在是'+this.data.is_num);
    //console.log('screenNum' + this.data.screenNum);
    //console.log(this.data.screenStr);
  },
  btnJs:function(){
    console.log(this.data.screenNum);
    console.log(this.data.screenStr);
    var result=0;
    var strs = new Array(); //定义一数组
    strs = this.data.screenStr.split(","); //字符分割
    for (var i = 0; i < strs.length; i++) {
      //console.log(strs[i] + i); //分割后的字符输出
      if (strs[i]=='+'){
        result = parseInt(strs[i - 1]) + parseInt(strs[i+1]);
      }
      if (strs[i] == '-') {
        result = strs[i - 1] - strs[i + 1];
      }
      if (strs[i] == '*') {
        result = strs[i - 1] * strs[i + 1];
      }
      if (strs[i] == '/') {
        result = strs[i - 1] / strs[i + 1];
      }
    }
    console.log('result:'+result);
    this.setData({ screenNum: result});
    this.setData({ screenStr: result });
  },
  btnClear:function(){
    //把标记恢复成默认状态
    this.setData({ screenNum: 0 });
    this.setData({ screenStr: 0 });
    this.setData({ is_num: 1 });
  }
})
总结,在小程序的布局方面引入了相对单位rpx,需要在学习一下弹性盒子flex布局。对于js部分,和vue.js有些类似,都是对数据进行绑定,简化js的dom操作。这两点还是需要再看看。
以上就是本文的全部内容,希望对大家的学习有所帮助,也希望大家多多支持NICE源码。


