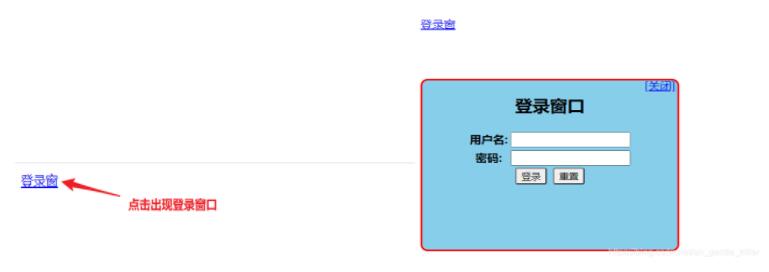
本文实例为大家分享了JavaScript实现登录窗体的具体代码,供大家参考,具体内容如下

思路:就是把登陆窗放在界面之外,然后通过script内的函数改变到界面之内!
<!DOCTYPE html>
<html lang="en">
<head>
<meta charset="UTF-8">
<title>我的登录窗体</title>
<style>
.loginDiv{
/*设置登录框的外观*/
border: solid red 3px;
border-radius: 10px;
width: 350px;
height: 250px;
background-color: skyblue;
/*设置登录框的位置*/
position: absolute;
top: -300px;
}
button{
/*设置button的样式*/
border-radius: 3px;
}
#closeDiv{
/*设置关闭按钮位置*/
position: relative;
top: -160px;
left: 305px;
}
</style>
</head>
<body>
<a href="javaScript:login()" rel="external nofollow" >登录窗</a>
<div class="loginDiv" id="loginDiv">
<h2 align="center">登录窗口</h2>
<table align="center">
<tr>
<th>用户名:</th>
<th><input type="text"></th>
</tr>
<tr>
<th>密码:</th>
<th><input type="password"></th>
</tr>
<tr>
<th colspan="2">
<button>登录</button> 
<button type="reset">重置</button>
</th>
</tr>
</table>
<div id="closeDiv"><a href="javaScript:close()" rel="external nofollow" >[关闭]</a></div>
</div>
<script>
function login() {
//获得登录对象
let loginDivObj = document.getElementById("loginDiv");
loginDivObj.style.top="100px";
//设置过渡属性,参一:transitionProperty:规定应用过渡效果的 CSS 属性的名称。
// 参二:transitionDuration:规定完成过渡效果需要多少秒或毫秒。
// 参三:transitionTimingFunction:规定过渡效果的速度曲线。
// 参四:transitionDelay:定义过渡效果何时开始。
loginDivObj.style.transition="top 600ms linear 500ms";
}
function close() {
//获得登录对象
let loginDivObj = document.getElementById("loginDiv");
loginDivObj.style.top="-300px";
}
</script>
</body>
</html>
以上就是本文的全部内容,希望对大家的学习有所帮助,也希望大家多多支持NICE源码。


