目录
- 一、新增
- 二、修改
element-ui是由饿了么前端团队推出的一套为开发者、设计师和产品经理准备的基于Vue.js 2.0的桌面组件库,而手机端有对应框架是 Mint UI 。整个ui风格简约,很实用,同时也极大的提高了开发者的效率,是一个非常受欢迎的组件库。
一、新增
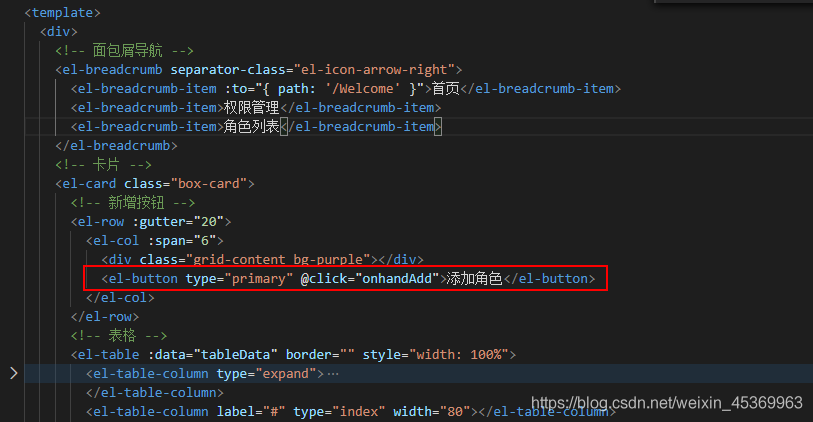
1、新增按钮
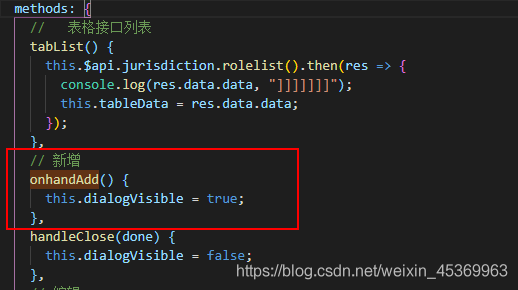
2、新增事件 在methods中,用来打开弹窗,
dialogVisible在data中定义使用有true或false来控制显示弹框
**3、新增确定,弹框确定事件 ,新增和修改共用一个确定事件,使用id区别
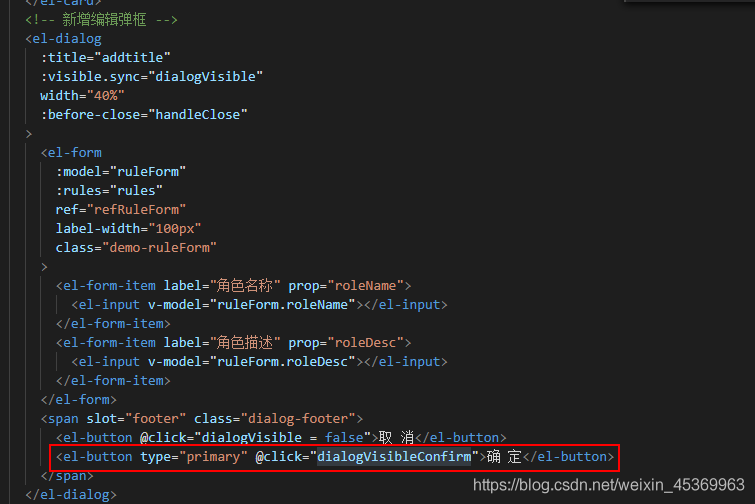
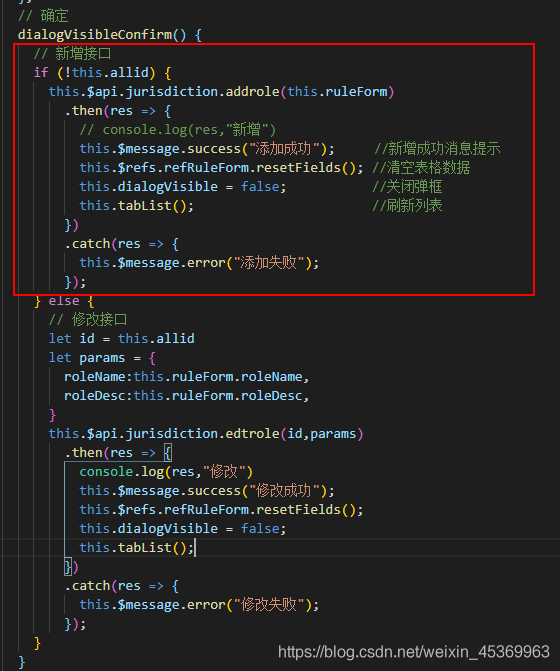
**3、新增事件
调新增接口,判断是否有id,没有就调新增接口
二、修改
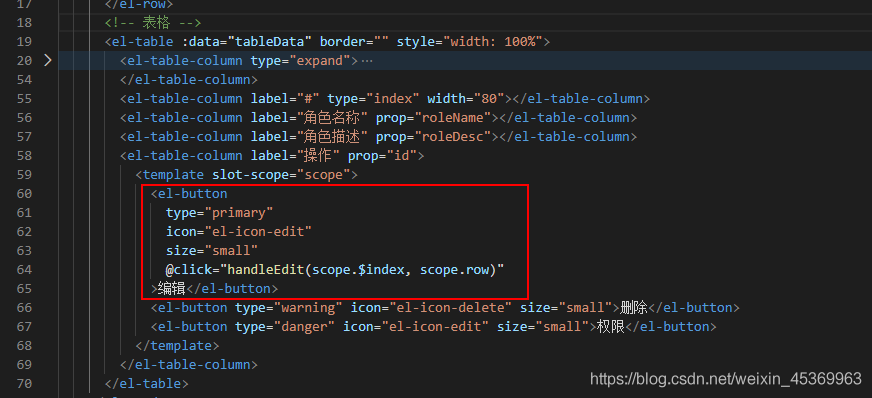
2-1、修改按钮 ,表格行编辑按钮使用scope.row拿到当前行的数据
2-2、修改事件, 把当前行数据赋值给表单,就把当前行数据回显出来了
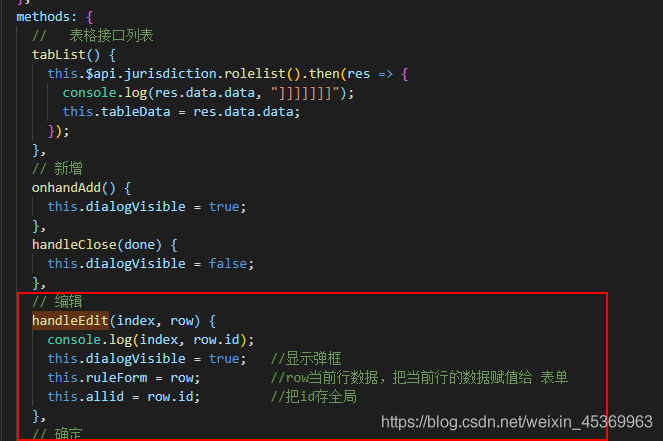
2-3、修改事件
修改接口,判断是否有id,有就调修改接口**
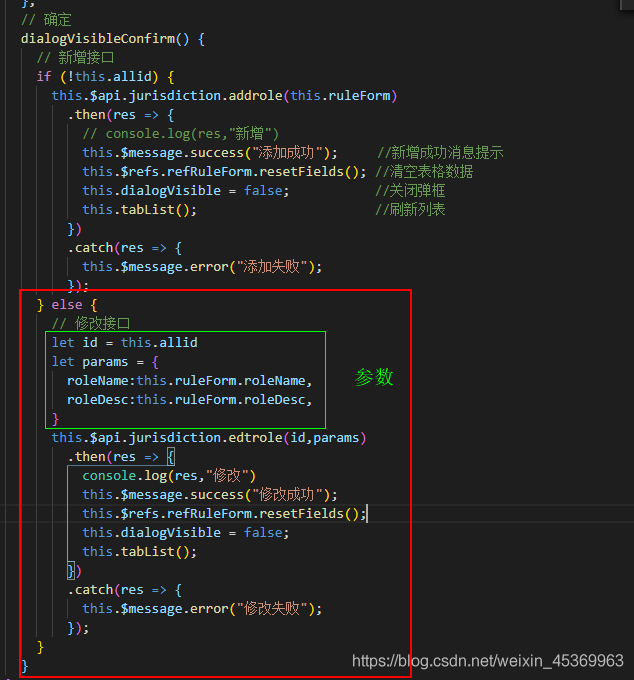
下面直接上代码了
<template>
  <div>
    <!-- 面包屑导航 -->
    <el-breadcrumb separator-class="el-icon-arrow-right">
      <el-breadcrumb-item :to="{ path: '/Welcome' }">首页</el-breadcrumb-item>
      <el-breadcrumb-item>权限管理</el-breadcrumb-item>
      <el-breadcrumb-item>角色列表</el-breadcrumb-item>
    </el-breadcrumb>
    <!-- 卡片 -->
    <el-card class="box-card">
      <!-- 新增按钮 -->
      <el-row :gutter="20">
        <el-col :span="6">
          <div class="grid-content bg-purple"></div>
          <el-button type="primary" @click="onhandAdd">添加角色</el-button>
        </el-col>
      </el-row>
      <!-- 表格 -->
      <el-table :data="tableData" border="" style="width: 100%">
        <el-table-column type="expand">
          <template slot-scope="scope">
            <el-row
              :class="['bdbottom',i1 === 0? 'bdtop' : '', 'vcenter'] "
              :gutter="20"
              :span="6"
              v-for="(item_ong,i1) in scope.row.children"
              :key="item_ong.id"
            >
              <!-- 一级 -->
              <el-col :span="5">
                <el-tag>{{item_ong.authName}}</el-tag>
                <i class="el-icon-caret-right"></i>
              </el-col>
              <!-- 二级和三级 -->
              <el-col :span="19">
                <!-- 二级权限 -->
                <el-row v-for="(item_two,i2) in item_ong.children" :key="i2">
                  <el-col :span="6">
                    <el-tag type="success">{{item_two.authName}}</el-tag>
                    <i class="el-icon-caret-right"></i>
                  </el-col>
                  <el-col :span="18">
                    <el-tag
                      type="warning"
                      v-for="(item_three,i3) in item_two.children"
                      :key="i3"
                    >{{item_three.authName}}</el-tag>
                    <i class="el-icon-caret-right"></i>
                  </el-col>
                </el-row>
              </el-col>
            </el-row>
          </template>
        </el-table-column>
        <el-table-column label="#" type="index" width="80"></el-table-column>
        <el-table-column label="角色名称" prop="roleName"></el-table-column>
        <el-table-column label="角色描述" prop="roleDesc"></el-table-column>
        <el-table-column label="操作" prop="id">
          <template slot-scope="scope">
            <el-button
              type="primary"
              icon="el-icon-edit"
              size="small"
              @click="handleEdit(scope.$index, scope.row)"
            >编辑</el-button>
            <el-button type="warning" icon="el-icon-delete" size="small">删除</el-button>
            <el-button type="danger" icon="el-icon-edit" size="small">权限</el-button>
          </template>
        </el-table-column>
      </el-table>
    </el-card>
    <!-- 新增编辑弹框 -->
    <el-dialog
      :title="addtitle"
      :visible.sync="dialogVisible"
      width="40%"
      :before-close="handleClose"
    >
      <el-form
        :model="ruleForm"
        :rules="rules"
        ref="refRuleForm"
        label-width="100px"
        class="demo-ruleForm"
      >
        <el-form-item label="角色名称" prop="roleName">
          <el-input v-model="ruleForm.roleName"></el-input>
        </el-form-item>
        <el-form-item label="角色描述" prop="roleDesc">
          <el-input v-model="ruleForm.roleDesc"></el-input>
        </el-form-item>
      </el-form>
      <span slot="footer" class="dialog-footer">
        <el-button @click="dialogVisible = false">取 消</el-button>
        <el-button type="primary" @click="dialogVisibleConfirm">确 定</el-button>
      </span>
    </el-dialog>
  </div>
</template>

<script>
export default {
  data() {
    return {
      tableData: [],
      dialogVisible: false,
      addtitle: "添加角色",
      ruleForm: {
        roleName: "",
        roleDesc: ""
      },
      allid: "",
      // 验证规则
      rules: {
        roleName: [
          { required: true, message: "请输入角色名称", trigger: "blur" },
          { min: 3, max: 5, message: "长度在 3 到 5 个字符", trigger: "blur" }
        ],
        roleDesc: [{ required: true, message: "角色描述", trigger: "blur" }]
      }
    };
  },
  created() {
    this.tabList();
  },
  methods: {
    //   表格接口列表
    tabList() {
      this.$api.jurisdiction.rolelist().then(res => {
        console.log(res.data.data, "]]]]]]]");
        this.tableData = res.data.data;
      });
    },
    // 新增
    onhandAdd() {
      this.dialogVisible = true;
    },
    handleClose(done) {
      this.dialogVisible = false;
    },
    // 编辑
    handleEdit(index, row) {
      console.log(index, row.id);
      this.dialogVisible = true;   //显示弹框
      this.ruleForm = row;         //row当前行数据,把当前行的数据赋值给 表单
      this.allid = row.id;         //把id存全局
    },
    // 确定
    dialogVisibleConfirm() {
      // 新增接口
      if (!this.allid) {
        this.$api.jurisdiction.addrole(this.ruleForm)
          .then(res => {
            // console.log(res,"新增")
            this.$message.success("添加成功");     //新增成功消息提示
            this.$refs.refRuleForm.resetFields(); //清空表格数据
            this.dialogVisible = false;           //关闭弹框
            this.tabList();                       //刷新列表
          })
          .catch(res => {
            this.$message.error("添加失败");
          });
      } else {
        // 修改接口
        let id = this.allid
        let params = {
          roleName:this.ruleForm.roleName,
          roleDesc:this.ruleForm.roleDesc,
        }
        this.$api.jurisdiction.edtrole(id,params)
          .then(res => {
            console.log(res,"修改")
            this.$message.success("修改成功");
            this.$refs.refRuleForm.resetFields();
            this.dialogVisible = false;
            this.tabList();
          })
          .catch(res => {
            this.$message.error("修改失败");
          });
      }
    }
  }
};
</script>

<style scoped>
.bdtop {
  border-top: 1px solid #eee;
  padding-top: 10px;
}
.bdbottom {
  border-bottom: 1px solid #eee;
  padding-bottom: 10px;
  padding-top: 10px;
}
.el-tag {
  margin: 10px 0px;
}
.vcenter {
  display: flex;
  align-items: center;
}
</style>
以上就是vue+elementui 实现新增和修改共用一个弹框的完整代码的详细内容,更多关于vue elementui弹框的资料请关注NICE源码其它相关文章!
